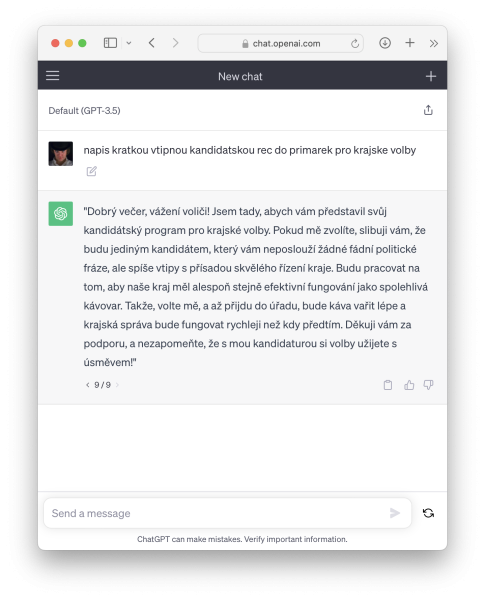
Did ChatGPT fulfilled my request? Is the response so embarrassing that it is actually funny?

Did ChatGPT fulfilled my request? Is the response so embarrassing that it is actually funny?
AWS does not support moving S3 buckets, so actually we will be syncing the content from original account/bucket to a new account/bucket.
Note: the following instructions are for a simple scenario – there in an app that only reads/writes data from/to S3. So we copy data from old bucket to a new bucket without any special ACLs.
Assuming you have new account and bucket created, you will need following to start the process:
Login to SOURCE account management console, go to IAM / Users / particular user you would like to use for doing the transfer and set following Inline policy to ensure an user from SOURCE account can read from SOURCE bucket and write to DESTINATION bucket – change old and new bucket name:
{
    "Version": "2012-10-17",
    "Statement": [
        {
            "Effect": "Allow",
            "Action": [
                "s3:ListBucket",
                "s3:GetObject"
            ],
            "Resource": [
                "arn:aws:s3:::_old_bucket_",
                "arn:aws:s3:::_old_bucket_/*"
            ]
        },
        {
            "Effect": "Allow",
            "Action": [
                "s3:ListBucket",
                "s3:PutObject",
                "s3:PutObjectAcl"
            ],
            "Resource": [
                "arn:aws:s3:::_new_bucket_",
                "arn:aws:s3:::_new_bucket_/*"
            ]
        }
    ]
}
If you intend to transfer multiple buckets, just list them all in Resource sections above.
Now while you are in user details you can take ARN of the user if you do not have it already. It is on user details page and looks like:
"arn:aws:iam::_aws_account_id_:user/_username_"Login to DESTINATION account management console and set a policy on DESTINATION bucket to allow user from SOURCE account write to DESTINATION bucket:
{
	"Version": "2012-10-17",
	"Statement": [
    {
      "Sid": "AccountsTransfer",
      "Action": [
        "s3:ListBucket",
        "s3:PutObject",
        "s3:PutObjectAcl"
      ],
      "Effect": "Allow",
      "Resource": [
        "arn:aws:s3:::remastermedia-files-paveltuma",
        "arn:aws:s3:::remastermedia-files-paveltuma/*"
      ],
      "Principal": {
        "AWS": [
          "arn:aws:iam::_aws_account_id_:user/_username_"
        ]
      }
    }
  ]
}
Set DESTINATION bucket default object ownership to be the DESTINATION account. Go to DESTINATION bucket / Permissions / Object ownership and set it to Bucket owner preferred.
Setup aws cli to use the user that will be used to sync data and then perform:
aws s3 sync s3://_old_bucket_ s3://_new_bucket_ --region _new_region_ --acl bucket-owner-full-controlDepending on a volume of your data it may take long, so I recommend to execute it in a terminal multiplexer such as tmux.
You may experience errors when syncing the files with some unicode characters – not all, but emoji mostly in my case. Basically it will say copy failed:
copy failed: s3://_old_bucket_/prefix/🔥.wav to s3://_new_bucket_/prefix/🔥.wav An error occurred (InvalidRequest) when calling the CopyObject operation: Couldn't parse the specified URI.It seems this is an issue of S3 that it does not handle these filenames when syncing between different AWS regions.
The easiest workaround in my case was to download the files from SOURCE bucket to a local filesystem and re-upload them into DESTINATION bucket. But of course this may not apply to you.
Zero Method & Optiv – Bitter Pill [Play]
Satl & Malaky – All By Myself
Marso & Gala – When summer comes [Play]
Super imporant step before you start with the upgrade is to check ALL your OpenVZ containers run SUPPORTED distros! Very short and hard to notice list is on Promox’s LXC wiki page.
I had to revert back to version 3.4 as most of the containers we run are based on CentOS7 and various versions of Fedora. So I have only couple of issues that appeared during upgrade and I was able to fix them:
bnx2 firmware missing appeared during apt-get dist-upgrade . Check the output and if you get, them install manually firmware-bnx2 manually, otherwise you will end up with no network after reboot to Promox 4.venet device may be configured to set default gateway in /etc/sysconfig/network. Change it to the device you created while converting container. You can also delete ifcfg-venet* files in /etc/sysconfig/network-scripts/ as they are no longer needed.Install necessary packages first.
$ yum install subversion mod_dav_svn mod_ldap python-ldap
Prepare configuration for Apache. Create a file /etc/httpd/conf.d/subversion.conf and put the content bellow into it. Change location, physical path on disk, Active Directory LDAP server and bind credentials to your particular environment.
RewriteEngine on
RewriteCond %{REQUEST_URI} ^/$
RewriteCond %{HTTP_USER_AGENT} !^SVN/
RewriteRule ^(.*/)$ %0/ [R=301,L]

<Location /svn>
 DAV svn

 SVNParentPath /var/www/svn
 SVNListParentPath on
 SVNCacheTextDeltas off
 SVNCacheFullTexts off
 SVNAllowBulkUpdates on
 SVNIndexXSLT "/svnindex.xsl"
 AuthzSVNAccessFile /etc/subversion/access.conf

 Options Indexes

 AuthBasicProvider ldap
 AuthName "Memos Subversion Repositories"
 AuthType Basic
 AuthLDAPBindDN "CN=svn_user,OU=Service Accounts,DC=domain,DC=com"
 AuthLDAPBindPassword svn_user_password
 AuthLDAPURL "ldap://global_catalog.domain.com:3268/OU=People,DC=domain,DC=com?sAMAccountName?sub?(objectCategory=person)"
 Require valid-user

 ExpiresActive on
 ExpiresDefault access
</Location>
Create a directory where Subversion data will be stored if it does not already exist:
$ mkdir -p /var/www/svn
Change the permissions of this directory to be owned (or at least writeable by Apache):
$ chown apache:apache /var/www/svn
Start Apache
$ systemctl start httpd
Now you need to setup access permissions. There is a catch. There is no simple way how to use Active Directory groups, so we need to synchronize groups from AD to local authz configuration file which we have already configured in Apache confiuration before. To do it we will use sync_ldap_groups_to_svn_authz.
Create authz file and put to the top users which will have access to all repositories (such administrators with read write access or continuos intergration user with read only access). Then put particular repositories permissions. You can already add groups from Active Directory. At the end will be part of the config file dedicated to groups definitions and at the very end the comment we will use to find out where the grous definition start. See:
[/]
admin = rw
ci = r

[repository1:/]
user1 = rw
@SVN_GROUP1 = rw

[groups]
### Start generated content: LDAP Groups to Subversion Authz Groups Bridge ###
Now dowload sync_ldap_groups_to_svn_authz.py and create synchronization script (adjust the details within).
#!/bin/sh

SVN_CONF_DIR=/etc/subversion
JW_TOOLS_DIR=/opt

# truncate the access file after the generated-content tag
perl -0777 -pe 's/\n\n\n### Start generated content.*//s' \
    < $SVN_CONF_DIR/access.conf \
    > $SVN_CONF_DIR/access.conf.tmp

echo "### Start generated content: LDAP Groups to Subversion Authz Groups Bridge ###" >> $SVN_CONF_DIR/access.conf.tmp

# append the latest LDAP group configuration
$JW_TOOLS_DIR/sync_ldap_groups_to_svn_authz.py \
    --quiet --url="ldap://dc1.memos.cz:3268" \
    --bind-dn="CN=SVN,OU=Service Accounts,OU=People,DC=memos,DC=cz" --bind-password="REV-Code-673" --base-dn="OU=SVN Groups,OU=Groups,DC=memos,DC=cz" \
    --userid_attribute="sAMAccountName" | grep -v '^\[groups\]' | grep -v '^\#' | grep -v '^$' | sort >> $SVN_CONF_DIR/access.conf.tmp

mv -f $SVN_CONF_DIR/access.conf.tmp $SVN_CONF_DIR/access.conf
Run this script manually or from cron.
DJ Marky – Getaway (feat. Adrienne Richards & Random Movement)
Bredren – Rotten (Amoss Remix)
I have spend couple of hours to find out what is wrong with my JIRA migration to find out the problem was in CentOS upgrade from 7.0 to 7.1 :( So if your container has no venet interface and thus no IP address after reboot, the problem is in broken initscripts package and you can fix it by a patch to /etc/sysconfig/network-scripts/ifup-aliases from Redhat’s Bugzilla:
--- ifup-aliases.orig	2015-04-01 08:46:08.179879018 +0200

+++ ifup-aliases	2015-04-01 08:46:52.558427785 +0200

@@ -261,7 +261,8 @@

                is_available ${parent_device} && \

                ( grep -qswi "up" /sys/class/net/${parent_device}/operstate ||  grep -qswi "1" /sys/class/net/${parent_device}/carrier ) ; then

                    echo $"Determining if ip address ${IPADDR} is already in use for device ${parent_device}..."

-				   if ! /sbin/arping -q -c 2 -w ${ARPING_WAIT:-3} -D -I ${parent_device} ${IPADDR} ; then

+				   /sbin/arping -q -c 2 -w ${ARPING_WAIT:-3} -D -I ${parent_device} ${IPADDR}

+				   if [ $? = 1 ]; then

 					   net_log $"Error, some other host already uses address ${IPADDR}."

 					   return 1

 				   fi